


Deep pocket milling in aluminum requires more than selecting a sharp cutter and increasing spindle speed. A deep cavity can create tool deflection, chip recutting, heat buildup, vibration, poor wall straightness, and inconsistent surface finish. This step-by-step guide explains how to plan, machine, inspect, and improve deep aluminum pockets for reliable production results. For dependable Aluminum CNC Machining Services, Jixing helps manufacturers control dimensional accuracy, cycle time, and surface quality from prototype to production.
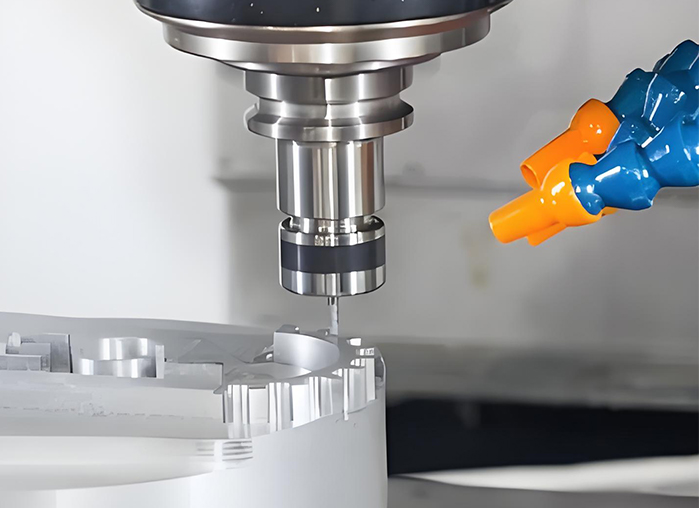
1. Define the Deep Pocket Requirements Before Programming
Confirm the pocket dimensions, tolerance, depth, and finish requirements
The first step is to convert the drawing or 3D model into measurable machining requirements. A deep pocket should not be evaluated only by its depth. The width, corner radius, depth-to-width ratio, wall tolerance, floor flatness, and surface roughness all influence the process plan.
- Record the pocket length, width, and total depth.
- Calculate the depth-to-width ratio. A narrow pocket with a high ratio is more difficult than a wide pocket of the same depth.
- Identify dimensional tolerances for the pocket walls, floor, corner radii, and position.
- Record the required surface roughness, such as Ra 3.2 micrometers, Ra 1.6 micrometers, or a customer-specific value.
- Check whether the pocket has thin walls, interrupted corners, islands, internal steps, or difficult-to-reach areas.
- Confirm the aluminum alloy and temper, such as 6061-T6, 7075-T6, 2024-T3, or cast aluminum.
- Determine whether anodizing, chemical conversion coating, painting, or another finishing process will follow milling.
Identify the purchasing risks that affect the final part
Purchasing teams usually need more than a low machining price. They need confidence that the supplier can repeat the result across the entire order. The main concerns include:
- Dimensional variation between the first article and later batches.
- Visible chatter marks on deep pocket walls.
- Tool breakage and unexpected delays caused by poor chip evacuation.
- Warping after material removal from a stressed aluminum plate.
- Long lead times caused by repeated setup changes or rework.
- Unclear inspection reports and insufficient evidence of process control.
- Surface damage caused by clamping, chip recutting, or manual deburring.
- Uncertainty about whether the supplier can maintain accuracy after anodizing.
Set a practical inspection target before cutting metal
Do not wait until machining is complete to decide how the pocket will be inspected. Define the measurement method in advance. For example, a deep pocket may require a coordinate measuring machine for position and wall accuracy, a bore gauge or calibrated depth probe for depth, and a surface roughness tester for the floor and walls.
Also clarify the inspection datum, sampling frequency, report format, material certification requirements, and acceptable visual defects. This prevents disagreements between the manufacturer and purchasing team after delivery.
2. Select the Correct Tools and Cutting Parameters
Use a complete tool and measurement list
The following tools are commonly required for accurate deep pocket milling in aluminum:
- Three-axis, four-axis, or five-axis CNC machining center with sufficient travels and rigidity.
- High-speed spindle suitable for aluminum machining.
- Two-flute or three-flute carbide end mills designed for aluminum.
- Variable helix or variable pitch carbide tools for vibration control.
- Long-reach roughing tools and short, rigid finishing tools.
- High-helix polished flute cutters for efficient chip evacuation.
- Small-radius or ball nose cutters for floor transitions and contoured surfaces.
- Tool presetter or tool measurement system.
- Workholding fixture with adequate support below the part.
- Flood coolant, through-tool coolant, high-pressure air, or minimum quantity lubrication equipment.
- Dial indicator and edge finder for workpiece alignment.
- Calipers, micrometers, depth gauges, and bore gauges.
- Coordinate measuring machine for critical dimensions and position.
- Surface roughness tester for customer-specified finish requirements.
- Deburring tools, nylon brushes, and clean inspection materials.
Choose a cutter with the correct geometry for aluminum
Aluminum tends to form long, sticky chips that can weld to the cutting edge. A polished carbide cutter with a high helix angle helps reduce built-up edge and improves chip removal. Two-flute cutters provide more flute space for chips, while three-flute cutters can provide a better balance between productivity and chip evacuation.
For a deep pocket, avoid using a long, thin cutter for the entire process when a shorter tool can reach the feature. A long tool has lower bending stiffness and is more likely to deflect or vibrate. Use the shortest tool that safely reaches the cutting zone.
Calculate speed, feed, and chip load instead of guessing
Start with the tool manufacturer's recommended cutting data and adjust it for the machine, fixture, tool overhang, alloy, and pocket geometry. The basic relationships are:
- Spindle speed: RPM = cutting speed x 1000 divided by pi x tool diameter.
- Feed rate: feed rate = RPM x number of flutes x chip load.
- Radial engagement: ae is the width of cut across the tool diameter.
- Axial engagement: ap is the depth of cut along the tool axis.
Use a conservative starting point when the pocket is narrow or deep. A small radial engagement with a controlled axial depth often reduces cutting force and tool deflection. Increase feed or speed only after confirming that the chips are evacuating properly and that the tool is not rubbing.
3. Prepare the Workpiece, Fixture, and CNC Program
Support the aluminum blank against movement and distortion
Deep pockets remove a significant amount of material. If the remaining walls or bottom section become thin, the part can move during machining or after it is released from the fixture. The fixture must support the blank without creating excessive clamping stress.
- Inspect the raw material for bow, twist, dents, and surface damage.
- Face the reference surface if the stock is not flat enough for reliable location.
- Use a stable datum scheme based on the drawing or model.
- Place support points beneath areas that will remain in the finished component.
- Use soft jaws, vacuum workholding, or custom locating features when conventional clamping could mark the surface.
- Apply only enough clamping force to prevent movement.
- Check that the tool can access the entire pocket without colliding with the fixture.
- Measure the workpiece position with an indicator and set the work offset accurately.
Use a roughing, semi-finishing, and finishing strategy
Do not attempt to reach final size in one heavy operation. A staged process controls cutting force and leaves a predictable amount of material for finishing.
- Face the top surface and establish a clean reference plane.
- Rough the pocket using adaptive clearing, dynamic milling, or another constant-engagement strategy.
- Leave a consistent stock allowance on the walls and floor.
- Inspect the rough pocket for tool marks, built-up edge, and trapped chips.
- Semi-finish the walls and floor to reduce remaining stock variation.
- Finish the walls with a rigid tool and a light, consistent radial engagement.
- Finish the floor using a suitable step-over and tool path direction.
- Perform a final spring pass if the tolerance and machine stability justify it.
- Deburr the part without rounding critical edges or damaging the finished surface.
Program the tool path to reduce heat and vibration
Adaptive or constant-engagement roughing is usually preferable to full-width slotting because it keeps the cutting load more stable. Enter the material gradually with a ramp, helical interpolation, or controlled plunge method that is approved for the selected tool.
For finishing, avoid abrupt changes in tool direction. Use smooth arcs, climb milling where suitable, and lead-in and lead-out movements outside the final wall. A continuous tool path can reduce witness marks at the connection between separate passes.
4. Machine the Pocket in Controlled Steps
First step: verify the setup and run a safe simulation
Before cutting the workpiece, simulate the program with the actual tool lengths, holder dimensions, fixture model, and work offset. Confirm that the tool can reach the bottom of the pocket and that the holder does not contact the walls.
- Check tool number, diameter, flute count, and measured length.
- Confirm the spindle direction and coolant command.
- Verify the material thickness and Z zero position.
- Check rapid movements above clamps and fixture components.
- Review the minimum tool clearance at the deepest point.
- Run the first cycle in single block or reduced feed mode when appropriate.
Second step: rough the pocket while protecting the tool
Use a roughing cutter with enough flute length to clear the pocket but avoid unnecessary stickout. Maintain a consistent radial engagement and remove material in levels rather than forcing the tool into a full-width cut.
During roughing, monitor spindle load, cutting sound, chip shape, and coolant flow. Aluminum chips should leave the pocket rather than accumulate around the tool. If chips are being recut, stop the cycle and correct the coolant direction, air blast, tool path, or cutting parameters.
Third step: inspect the rough pocket before finishing
Remove chips and inspect the pocket while sufficient material remains for correction. Check for:
- Remaining stock on all walls and the floor.
- Tool deflection near the deepest section.
- Uneven material caused by workpiece movement.
- Built-up aluminum on the cutter.
- Chatter marks or signs of excessive tool overhang.
- Damage around entry points and corners.
If the stock allowance is inconsistent, finishing may not correct the problem. Adjust the setup or add a semi-finishing operation before continuing.
Fourth step: semi-finish the walls and floor
Semi-finishing removes high spots and creates a more uniform surface for the final pass. It also reduces the cutting force required during finishing. Use a tool with adequate rigidity and leave a small, controlled allowance based on the required tolerance and machine capability.
For deep walls, consider separate tool paths for the upper and lower sections if the tool deflects differently at different depths. A lower cutting load near the bottom can improve straightness and reduce taper.
Fifth step: finish the walls and corners
Use a short, rigid finishing tool whenever possible. Maintain a steady feed rate and avoid pausing against the wall. A dwell can leave a visible mark or create local heat.
For sharp internal corners, remember that a round cutter cannot produce a zero-radius corner. The programmed tool diameter and corner radius must match the drawing. If the design allows it, a larger internal radius improves tool strength, chip evacuation, and machining time.
Sixth step: finish the pocket floor
Floor finish depends on tool geometry, step-over, spindle runout, machine rigidity, and the flatness of the tool path. Use a flat end mill for a planar floor and a ball nose or radius tool for a contoured transition.
Use parallel passes, constant scallop passes, or another suitable finishing strategy. Keep the step-over small enough to meet the surface roughness requirement, but confirm that the cutter is still removing material rather than rubbing.
Seventh step: deburr, clean, and inspect the finished pocket
Remove burrs with a controlled hand tool, nylon brush, or approved edge finishing process. Avoid aggressive abrasive pads on functional walls because they can alter dimensions and create an inconsistent appearance.
Clean the pocket completely before measurement. A single trapped chip can change a depth reading or prevent a probe from reaching the true floor.
5. Control Chip Evacuation, Heat, and Surface Finish
Keep chips from being recut inside the deep cavity
Chip evacuation is one of the most important factors in deep aluminum milling. Recutted chips can scratch the wall, weld to the cutter, increase cutting force, and produce an uneven finish.
- Direct flood coolant toward the deepest cutting zone.
- Use high-pressure air when it can remove chips without spreading them into nearby features.
- Use through-tool coolant when the tool and machine support it.
- Adjust nozzle position as the tool moves deeper into the pocket.
- Use fewer flutes when additional flute space is needed for chip removal.
- Stop and clear chips if the pocket begins to fill.
- Do not allow the tool to bury itself in a compacted chip bed.
Prevent heat buildup and aluminum adhesion
Aluminum can generate excessive heat when the tool rubs, the edge is dull, or chips cannot escape. Heat can expand the part during cutting and cause measurements to change after the part returns to room temperature.
Use a sharp tool, adequate chip load, stable coolant delivery, and a cutting path that avoids prolonged dwell. Measure critical dimensions only after the component has stabilized at the inspection room temperature.
Improve the wall and floor surface finish
A poor surface finish is often caused by several small problems rather than one incorrect parameter. Check the following factors systematically:
- Tool runout at the cutting edge.
- Excessive tool stickout.
- Insufficient chip load causing rubbing.
- Excessive radial engagement.
- Uneven stock left by roughing.
- Machine vibration or fixture movement.
- Worn, chipped, or aluminum-loaded cutting edges.
- Improper step-over during floor finishing.
- Inconsistent feed rate at corners and transitions.
When chatter appears, first reduce tool overhang and improve workholding. Then review the tool diameter, flute geometry, spindle speed, radial engagement, and feed rate. Changing spindle speed alone may hide the problem without solving the underlying rigidity issue.
6. Inspect Accuracy and Surface Quality After Machining
Measure the pocket using a repeatable inspection sequence
Inspection should follow the same order for every part so that results can be compared across a batch.
- Allow the part to reach a stable room temperature.
- Clean all chips, coolant residue, and burrs from the pocket.
- Verify the external datum surfaces first.
- Measure pocket position relative to the defined datums.
- Measure the pocket length, width, and depth at multiple locations.
- Check wall straightness and parallelism from the top to the bottom.
- Measure floor flatness if it is a functional requirement.
- Inspect corner radii with a suitable gauge or CMM.
- Measure surface roughness on representative wall and floor areas.
- Record the results in a first article or final inspection report.
Use CMM inspection for critical geometry
A coordinate measuring machine can evaluate pocket location, wall geometry, depth, flatness, perpendicularity, and profile more reliably than manual tools alone. For deep pockets, use a probe extension only when necessary because long probe extensions can introduce measurement deflection.
When the pocket is too deep for direct tactile inspection, confirm that the inspection probe can reach the bottom without contacting the walls. Optical systems can assist with some features, but reflective aluminum surfaces may require suitable lighting, surface preparation, or tactile confirmation.
Inspect surface finish consistently
Surface roughness readings must be taken with the correct cutoff length, evaluation length, direction, and instrument setting. Measure wall finish in the direction specified by the quality plan and compare readings from more than one location if the pocket is large or deep.
Visual inspection should also identify chatter, tool lines, scratches, smeared aluminum, burrs, discoloration, and coolant stains. A part can meet a roughness value while still showing a cosmetic defect that is unacceptable to the customer.
7. Avoid Common Deep Pocket Milling Mistakes
Mistake 1: Using excessive tool overhang
A long tool may be necessary, but unnecessary stickout increases deflection and vibration. Use a larger tool diameter when the corner radius permits it, choose a rigid holder, and keep the cutting length as short as possible.
Mistake 2: Cutting the entire pocket with a full-width slot
Full-width slotting creates high cutting forces and gives chips less room to escape. It can cause heat buildup, tool deflection, and premature edge failure. Use adaptive roughing or another reduced-engagement strategy where the machine and geometry allow it.
Mistake 3: Finishing before stabilizing the rough stock
If roughing leaves an uneven allowance, the finishing tool will encounter changing cutting forces. This produces taper, chatter, and inconsistent surface finish. Add a semi-finishing pass to create a stable and predictable finishing allowance.
Mistake 4: Ignoring material stress and workpiece movement
Rolled aluminum plate may contain residual stress. Removing material from one side can cause the part to bow after machining or unclamping. Use stress-relieved material when appropriate, machine both sides in a balanced sequence, and inspect the part after release from the fixture.
Mistake 5: Allowing chips to remain in the pocket
Chip accumulation can damage the surface and cause the tool to cut previously produced chips. Improve coolant and air delivery, pause the program for safe chip removal when necessary, and make sure the tool path does not trap chips in internal corners.
Mistake 6: Using a worn or unsuitable tool
A dull tool generates heat and rubs the aluminum instead of cutting it cleanly. Replace tools according to measured wear, cutting load, surface condition, and batch requirements rather than waiting for catastrophic failure.
Mistake 7: Measuring the part while it is still hot
Thermal expansion can make a pocket appear larger or smaller than its stabilized dimension. Allow the component to cool naturally and measure it under controlled temperature conditions.
Mistake 8: Deburring too aggressively
Heavy manual deburring can enlarge openings, round functional edges, and create inconsistent corner geometry. Define the permitted edge break and use a controlled deburring method.
8. Choose an Aluminum CNC Machining Services Supplier That Controls the Entire Process
Review equipment, process capability, and inspection resources
Purchasing teams should evaluate whether a supplier has the equipment and process controls needed for deep pockets, not only whether the supplier can accept the CAD file.
- Confirm the machine's spindle speed, travels, rigidity, and coolant capability.
- Ask whether the supplier uses adaptive roughing and dedicated aluminum tooling.
- Check whether tool length measurement and tool breakage detection are available.
- Review fixture design capability for thin walls and deep cavities.
- Confirm access to CMM inspection and surface roughness measurement.
- Request material certificates and traceability for production orders.
- Ask how first article inspection and in-process inspection are managed.
- Review examples of similar deep pocket components.
Request a clear quotation and production plan
A reliable quotation should identify material, quantity, tolerance assumptions, surface finish, secondary operations, inspection requirements, packaging, and estimated lead time. If the design contains a difficult depth-to-width ratio, ask the supplier to identify the risk before production begins.
The supplier should also explain how it will control tool wear, workpiece movement, anodizing allowance, and final inspection. Clear communication at the quotation stage reduces rework and unexpected cost.
Use process evidence to reduce purchasing risk
Useful evidence may include a first article inspection report, sample measurement data, photographs of the finished pocket, material certificates, surface roughness results, and a documented corrective action process. These records help purchasing and engineering teams compare suppliers based on repeatability rather than price alone.
Jixing combines CNC process planning, aluminum-specific tooling, controlled workholding, in-process checks, and final inspection to support accurate deep pocket components. This approach helps customers reduce rework, improve delivery reliability, and maintain consistent surface finish across production batches.
Conclusion: Build Accuracy Into Every Deep Pocket Milling Step
Accurate deep pocket milling in aluminum depends on a complete process: define the requirements, choose rigid and suitable tools, support the workpiece, rough with controlled engagement, evacuate chips, semi-finish before finishing, inspect after thermal stabilization, and control every common source of deflection and vibration.
When deep pocket geometry is critical, experienced Aluminum CNC Machining Services can reduce production risk through better tooling, fixtures, process documentation, and inspection. Contact Jixing with your aluminum part drawing, alloy, quantity, tolerance, and surface finish requirement to develop a practical machining plan for your application.


