


Accurate Aluminum CNC Machining Services depend on more than machine resolution and cutting tools. A well-designed fixture controls the part location, supports thin sections, reduces vibration, improves repeatability, and makes inspection easier. This guide explains how to design and use a fixture for aluminum CNC machining, with practical steps that purchasing teams can use when evaluating a supplier such as Jixing.
What Buyers Need From an Aluminum CNC Machining Fixture
Purchasing teams usually search for fixture design information because they need predictable quality, not just a general explanation of workholding. The most useful content answers questions about accuracy, cost, production speed, inspection, and supplier responsibility.
Control part movement during machining
Aluminum is relatively soft and has a high coefficient of thermal expansion. Cutting forces can push the part away from its intended position, especially when machining thin walls, deep pockets, or unsupported edges. A fixture must resist movement without deforming the workpiece.
- Use positive location points to control the part in the X, Y, and Z directions.
- Place clamps close to supported areas.
- Keep clamping force directed toward the fixture base.
- Prevent rotation and sliding with properly positioned side locators.
Maintain repeatability across multiple parts
A fixture should allow every blank to be loaded against the same datums. Repeatable loading reduces setup variation and helps the machine produce consistent dimensions from the first part to the last part.
- Use hardened locating pins or precision stops for repeat production.
- Use soft jaws when the part has a complex or finished external profile.
- Mark the loading direction to prevent incorrect placement.
- Design visual and physical checks that confirm the part is fully seated.
Reduce purchasing and production risks
Buyers often need evidence that a supplier can control quality at production volume. A good fixture plan should identify the fixture material, locating method, clamping method, inspection approach, expected cycle time, and maintenance requirements before production begins.
- Ask whether the fixture has been verified with a first article part.
- Request the expected dimensional repeatability and inspection method.
- Confirm how the supplier will handle tool wear and fixture wear.
- Check whether the fixture can support future revisions or additional quantities.
How Fixture Design Improves Accuracy in Aluminum CNC Machining
Fixture design improves machining accuracy by creating a stable relationship between the workpiece, the machine coordinate system, and the cutting tool. The fixture does not replace machine calibration, but it helps the machine achieve its intended accuracy consistently.
Establish a reliable datum reference
The fixture transfers the engineering datums from the drawing to the machine. When the part is located from the correct surfaces, the machining process is less affected by rough stock variation or operator judgment.
A typical datum structure follows the 3-2-1 locating principle:
- Three primary locators support the main base surface and control vertical movement and rotation.
- Two secondary locators contact a side surface and control movement in one horizontal direction.
- One tertiary locator contacts another side surface and controls the remaining horizontal direction.
Locators should contact clean, stable surfaces. Avoid locating on burrs, sharp casting edges, flexible walls, or surfaces that will be removed during the next operation.
Support thin walls and delicate features
Thin aluminum walls can deflect under cutting pressure. If the fixture supports only the outside perimeter, the center of the part may vibrate or move. Additional support points reduce deflection and allow more stable cutting.
- Use adjustable support screws beneath thin floors and webs.
- Use a close-fitting nest for parts with irregular shapes.
- Use low-profile clamps where tool access is limited.
- Support areas near deep pockets and narrow ribs.
- Use vacuum or adhesive support only when mechanical clamping is unsuitable.
Support points must be adjusted carefully. An excessively tight support screw can lift the part away from the primary datum and create dimensional errors.
Control clamping force
Clamping force must be strong enough to prevent movement but low enough to avoid distortion. Aluminum parts with thin walls or large unsupported surfaces are especially sensitive to excessive force.
Effective clamping methods include:
- Strap clamps for simple prismatic workpieces.
- Toe clamps for low-profile access and high tool clearance.
- Soft jaws for shaped external surfaces.
- Hydraulic or pneumatic clamps for repeatable production loading.
- Vacuum fixtures for thin flat plates and parts with limited clamp zones.
- Custom clamps that follow nonmachined areas without touching finished surfaces.
Improve vibration control
Vibration creates poor surface finish, chatter marks, burrs, tool wear, and dimensional variation. A rigid fixture reduces the distance between the cutting force and the support structure.
- Use a thick fixture base with adequate stiffness.
- Minimize unsupported workpiece overhang.
- Position clamps near the cutting zone without blocking tool access.
- Provide full support under large flat surfaces.
- Use a balanced fixture when machining at high spindle speeds.
First Step: Review the Part and Drawing Before Designing the Fixture
The fixture should be designed from the part requirements, not from a standard clamp arrangement. Begin by reviewing the drawing, three-dimensional model, material, tolerances, quantity, and machining sequence.
Collect the required part information
Prepare the following information before fixture design begins:
- Part number and revision level.
- Aluminum alloy, such as 6061-T6, 7075-T6, 6082, or 5052.
- Raw material size and expected stock allowance.
- Critical dimensions and geometric tolerances.
- Flatness, parallelism, perpendicularity, and true position requirements.
- Surface finish requirements.
- Thin wall, deep pocket, small hole, and fragile feature locations.
- Required quantity and expected production frequency.
- Machining operations and the order in which they will be completed.
Identify the functional datums
Separate the surfaces that define part function from surfaces that are convenient for clamping. The fixture should normally locate from the most stable functional surfaces available at each operation.
- Mark the primary datum on the model and drawing.
- Identify the secondary and tertiary datums.
- Determine which surfaces are already machined and which are raw.
- Identify the surfaces that must remain free from clamp marks.
- Confirm which features require machining in one setup.
Plan the machining sequence
The first operation often creates the reference surfaces used by later operations. For example, a rough blank may be clamped on an external surface during the first operation. The part can then be turned over and located from the newly machined base and side datums during the second operation.
A common sequence is:
- Rough machine the primary reference surface.
- Machine the main outside profile and secondary datum surfaces.
- Finish critical holes, pockets, and faces from the controlled datums.
- Reorient the part using the finished reference surfaces.
- Complete remaining features and perform final inspection.
Second Step: Select the Fixture Type and Required Tools
The fixture type should match the part geometry, production volume, tolerance level, and available machine access. A simple fixture may be suitable for prototypes, while a dedicated fixture can reduce loading time and variation in high-volume production.
Choose the appropriate fixture type
- Machine vise with soft jaws for small batches and prismatic components.
- Modular fixture plate for prototypes and changing part designs.
- Dedicated nest fixture for irregular or contoured components.
- Multi-part fixture for repeat production and reduced cycle time.
- Vacuum fixture for thin plates and parts with limited clamping locations.
- Hydraulic or pneumatic fixture for fast, repeatable loading.
- Indexing fixture for multiple-sided machining.
Prepare the required tools and equipment
A reliable fixture setup normally requires more than clamps and a base plate. The following tool list covers design, setup, adjustment, and verification.
- CAD software for fixture layout and interference checking.
- CAM software for toolpath simulation.
- Precision fixture plate or machine table interface.
- Locating pins, diamond pins, and hardened stops.
- Strap clamps, toe clamps, step blocks, or custom clamps.
- Adjustable support screws and locking nuts.
- Soft jaw material, such as aluminum, steel, or engineered plastic.
- Torque wrench for consistent clamp tightening.
- Dial indicator or test indicator for fixture alignment.
- Edge finder or machine probe for work offset setting.
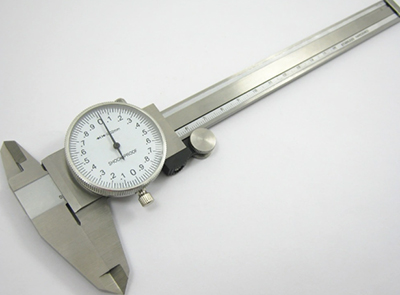
- Height gauge, calipers, micrometers, and bore gauges.
- Coordinate measuring machine for critical first article inspection.
- Deburring tools, brushes, and cleaning equipment.
- Chip evacuation equipment and coolant or minimum quantity lubrication equipment.
Check tool access and collision clearance
Fixture clamps and supports must not interfere with the spindle, tool holder, probe, coolant stream, or chip evacuation path. Simulate the entire operation before releasing the fixture for production.
- Check the longest tool and largest tool holder.
- Check rapid moves and rotary axis movements.
- Leave space for tool changes and probing cycles.
- Keep clamps below the toolpath whenever possible.
- Make sure chips cannot collect between the part and the locating surfaces.
Third Step: Build the Fixture Around Accurate Locating and Support
Once the fixture type is selected, create the fixture layout. The main goal is to constrain the part without overconstraining it or distorting it.
Design the primary support surface
The primary support surface should be rigid, cleanable, and stable. Use three or more support points for a stable base, but avoid unnecessary contact points that could prevent the part from seating consistently.
- Place the primary supports under the strongest areas of the part.
- Keep support points away from thin floors and unsupported skins.
- Use relief pockets to prevent chips from lifting the part.
- Provide clearance for burrs and unfinished stock.
- Use replaceable wear pads when the fixture will run frequently.
Position secondary and tertiary locators
Side locators should control horizontal movement while allowing the part to seat naturally. A round pin and a diamond pin can prevent overconstraint when the part expands or when hole spacing has a small manufacturing variation.
- Use a round locator to establish a primary hole or reference position.
- Use a diamond locator to control rotation without binding.
- Use adjustable stops for variable raw stock conditions.
- Place locators on surfaces that can withstand repeated contact.
- Make locators replaceable if they are exposed to tool or chip damage.
Set clamp locations and force directions
Each clamp should push the workpiece against a support or locator. A clamp that pushes sideways without a supporting stop can shift the part and change the work offset.
- Position the clamp above a rigid support point.
- Direct the force toward the primary support surface.
- Use the minimum force required to resist cutting loads.
- Keep clamp pads away from finished surfaces.
- Use broad pads or contoured pads to distribute pressure.
- Mark the required tightening sequence for the operator.
Provide chip and coolant management
Aluminum chips can become trapped under the workpiece or between a locator and the part. Even a small chip can raise the part and create a significant dimensional error.
- Add chip relief grooves around locating surfaces.
- Provide holes or channels for coolant drainage.
- Keep horizontal pockets on the fixture to a minimum.
- Use air blast or coolant flushes during the cycle.
- Make all critical locating surfaces easy to clean and inspect.
Fourth Step: Verify the Fixture Before Production
Fixture verification confirms that the design works in the real machine, not only in CAD. This step is essential when the part has tight tolerances or a high material cost.
Inspect the fixture itself
Measure the fixture before installing the first workpiece. Record the location, height, and condition of all critical elements.
- Check fixture plate flatness.
- Measure locator positions relative to the machine reference.
- Confirm support heights and clamp travel.
- Check that replaceable components are seated correctly.
- Verify that all fasteners are tightened and secured.
- Inspect for burrs, dents, and damaged locating surfaces.
Align the fixture on the CNC machine
- Clean the machine table, fixture base, and locating keys.
- Install the fixture using the planned table reference points.
- Indicate the fixture datum or alignment edge.
- Record the alignment error and adjust the fixture if necessary.
- Set the work coordinate system using an edge finder or probe.
- Confirm the Z height from the actual workpiece support surface.
- Run a dry cycle with the spindle above the part.
For repeat production, save the alignment data and use a documented setup sheet. This reduces the time needed to reinstall the fixture after maintenance or machine changes.
Run a first article inspection
The first article should be machined with conservative cutting conditions and inspected before full production begins.
- Load the workpiece against every locator and support.
- Apply the specified clamp sequence and torque.
- Probe or indicate the workpiece position.
- Run the first program with reduced rapid override if needed.
- Inspect critical dimensions, datums, holes, profiles, and flatness.
- Check for clamp marks, movement, chatter, and burrs.
- Compare the measured results with the drawing requirements.
- Adjust the fixture, work offset, or machining process only after identifying the cause.
Confirm repeatability with multiple parts
One acceptable part does not prove that the fixture is stable. Load and machine several parts using the same operator instructions, then compare the results.
- Measure the first, middle, and last parts in the batch.
- Record dimensions that are most sensitive to clamping.
- Compare variation between operators if more than one operator will load the fixture.
- Check whether chips or burrs affect seating after repeated cycles.
- Define a cleaning and inspection interval for the fixture.
Fifth Step: Optimize Fixture Performance for Aluminum
Aluminum machining requires attention to heat, burrs, tool forces, and surface protection. Fixture design and machining parameters should be optimized together.
Manage thermal expansion
Aluminum expands more than steel when heated. Heat from cutting, coolant temperature changes, and warm machine conditions can affect dimensional results.
- Use consistent coolant temperature when tight tolerances are required.
- Allow the part and fixture to reach a stable temperature before final inspection.
- Avoid trapping heat in a large solid fixture base without a cooling strategy.
- Use locating methods that do not bind the part during thermal expansion.
- Measure critical features under controlled temperature conditions.
Reduce burr-related positioning errors
Burrs can form on rough stock, drilled holes, and milled edges. If a burr lies beneath a locator, the workpiece may sit at an incorrect height or angle.
- Deburr all surfaces that contact the fixture.
- Brush or air-blow the part before loading.
- Inspect locating holes for raised edges.
- Use chamfers or relief features around fixture locators.
- Define a maximum allowable burr size for production operators.
Protect finished surfaces
Aluminum surfaces can be marked by sharp clamps, dirty support pads, or trapped chips. Protect cosmetic and sealing surfaces with suitable clamp pads and clean contact surfaces.
- Use nonmarring pads where practical.
- Use soft jaws that match the part profile.
- Keep steel chips away from aluminum contact surfaces.
- Use protective films only when they do not affect location or vacuum sealing.
- Inspect every contact point during the first article process.
Match cutting conditions to fixture stiffness
A strong fixture allows more stable cutting, but it does not eliminate the need for suitable feeds, speeds, depth of cut, and tool geometry. Use sharp aluminum-specific tools and avoid cutting conditions that overload thin sections.
- Use polished flute tools designed for aluminum.
- Maintain effective chip evacuation in deep pockets.
- Reduce radial engagement near thin walls.
- Use finishing passes to control final wall dimensions.
- Use smaller stepdowns when the fixture cannot fully support the feature.
Common Fixture Design Mistakes to Avoid
Many accuracy problems are caused by loading and workholding errors rather than machine failure. The following mistakes should be reviewed during design approval and production audits.
Using too many locating points
Too many fixed locators can overconstrain the part. Variation in raw stock, hole spacing, or thermal expansion can prevent the part from seating properly.
Use the minimum number of locating elements required to control movement. Replace one of two fixed pins with a diamond pin when thermal or positional variation is expected.
Clamping directly on thin walls
Direct clamp pressure can deform a thin wall and cause the part to return to a different shape after unclamping. Clamp against strong ribs, bosses, or supported areas whenever possible.
Ignoring raw material variation
A fixture designed for a perfect CAD model may fail when stock thickness, saw cut quality, casting variation, or extrusion straightness changes. Include relief, adjustable stops, or a roughing operation to handle realistic stock conditions.
Allowing chips under the part
Chips under a support or locator create an incorrect Z height and may tilt the workpiece. Add chip relief, cleaning procedures, and operator checks to the fixture design.
Blocking tool or probe access
Clamps that appear acceptable in a static drawing may interfere with angled tools, probing cycles, tool changes, or rotary movements. Complete a full collision simulation before machining the fixture.
Using excessive clamp force
Overtightening can crush soft aluminum, distort thin sections, and leave visible marks. Define clamp torque or hydraulic pressure in the setup documentation and verify it during production.
Failing to inspect fixture wear
Locators and soft jaws wear over time. Wear can cause gradual dimensional drift that may not be visible during normal loading.
- Inspect locator height and position at scheduled intervals.
- Replace worn pads and damaged pins.
- Check soft jaw fit after a defined number of cycles.
- Record fixture maintenance with the production lot.
How to Evaluate a Supplier's Fixture and Aluminum CNC Machining Services
Purchasing teams can use the following checklist when comparing suppliers. It helps separate a documented machining process from a process that depends mainly on operator experience.
Ask for a fixture plan
The supplier should be able to explain how the part will be located, supported, clamped, inspected, and removed. The plan should match the drawing datums and machining sequence.
- Fixture type and base material.
- Location of primary, secondary, and tertiary datums.
- Clamping method and specified force.
- Support method for thin walls and delicate features.
- Tool access and chip evacuation plan.
- Expected setup time and cycle time.
- Fixture inspection and maintenance schedule.
Review quality control capability
A capable supplier should connect fixture design with inspection results. Ask whether the supplier uses probing, first article inspection, in-process checks, and final dimensional reports.
- Coordinate measuring machine availability.
- Calibrated measurement equipment.
- Documented work instructions.
- First article and process inspection records.
- Traceability for material and production lots.
- Corrective action process for out-of-tolerance parts.
Compare cost against production risk
A low fixture price may create higher costs through rework, slow loading, scrap, and inconsistent quality. Compare the total production effect rather than the fixture purchase price alone.
- Prototype fixture cost.
- Dedicated production fixture cost.
- Expected reduction in setup time.
- Expected reduction in scrap and rework.
- Fixture life and replacement component cost.
- Ability to support future order quantities.
Use a practical supplier approval checklist
- Send the supplier the latest drawing and three-dimensional model.
- Confirm the aluminum alloy and material condition.
- Identify all critical dimensions and cosmetic surfaces.
- Request the proposed datum and fixture strategy.
- Review the fixture design for tool access and clamping marks.
- Approve the first article inspection plan.
- Confirm production capacity and fixture maintenance responsibility.
- Release repeat production only after fixture repeatability is demonstrated.
Final Fixture Design Checklist for Accurate Aluminum Machining
Before production release, verify every item below.
- The fixture locates the part from appropriate engineering datums.
- The part is fully constrained without unnecessary overconstraint.
- Primary supports are positioned beneath rigid areas.
- Thin walls, ribs, and deep pockets have adequate support.
- Clamp forces push the part against the supports.
- Clamp torque or pressure is defined and repeatable.
- Locators are protected from chips and burrs.
- Tool, holder, probe, coolant, and chip clearance have been checked.
- The fixture is aligned and documented on the CNC machine.
- A first article has been inspected against the drawing.
- Several consecutive parts have been measured for repeatability.
- Fixture cleaning, wear inspection, and replacement procedures are defined.
- Thermal effects have been considered for tight tolerances.
Effective fixture design turns machine capability into repeatable production accuracy. By using stable datums, controlled clamping, proper support, chip management, and documented verification, buyers can reduce scrap and receive more consistent parts. Jixing applies these principles when developing Aluminum CNC Machining Services for prototypes, small batches, and repeat production, helping customers achieve reliable dimensions, clean surfaces, and predictable delivery.


